Graph databases come with the power of discovering relations hard to find. Here, Neo4j is a cool graph database. As a nature of the nosql databases, it offers highly scalability feature as well. In this post, we are going to mention how to use neo4j graph database for facial recognition tasks.

Vlog
You are going to use neo4j first time? Cypher query language performs queries in neo4j graphs. You should read the blog post: Cypher Queries in Neo4j or watch the following video.
🙋♂️ You may consider to enroll my top-rated machine learning course on Udemy

You can either read this blog post or watch the following video. They both cover the face recognition with neo4j graph database.
Installation
Neo4j is based on java. This is clear because the J term in its name comes from java. I am using openjdk 1.8.0_282 in my macbook. Neo4j community edition 3 is compatible with java 1.8. Nowadays, the latest version of neo4j compatible with java 1.8 is 3.5.27. I will use this version in my experiments.
Besides, we will need neo4j graph data science library to handle similarity calculations. GDS 1.1.6 version is compatible with neo4j 3.5.27. It will download a zipped jar. You should unzip it and move the neo4j-graph-data-science-1.1.6-standalone.jar into the NEO4J_HOME/plugins folder.
Once you downloaded the community server, you should run the neo4j command in bin directory with console argument. Its equavilent is neo4j.bat in windows platforms.
cd /Users/sefik/Downloads/neo4j-community-3.5.27/bin
./neo4j console

Then, we will access neo4j console in the browser. Its live address should be appear in the command prompt: Remote interface available at localhost:7474 . On the other hand, we will access it on 7687 port with python client because it is mentioned that: Bolt enabled on 127.0.0.1:7687.
When you visit localhost:7474 in your browser, you are expected to enter credentials to connect. The default username password pair is neo4j. You will change the default password when you connect once.

Deepface
We will use deepface library for python to handle facial recognition tasks.
Let’s start with importing the library.
#!pip install deepface
from deepface import DeepFace
There are lots of facial images in its unit test folder. We actually do not know the identities of those items. Let’s read those items first. Python comes with an out-of-the-box operation system (os) module and it can walk in folders. We will store the files with .jpg extension in deepface/tests/dataset folder.
import os
img_paths = []
for root, dirs, files in os.walk("deepface/tests/dataset/"):
    for file in files:
        if '.jpg' in file:
            img_path = root+file
            img_paths.append(img_path)
Face recognition pipeline
A modern face recognition pipeline consists of 4 common stages: detect, align, represent and verify. Luckily, deepface handles all of those stages in the background..
Face recognition model
There are many state-of-the-art face recognition models that reached and passed the human level accuracy already: VGG-Face, Facenet, Dlib, ArcFace. You can run any of those models within deepface, they are all wrapped.
I’m going to use Facenet model in this experiment. It expects 160×160 shaped inputs whereas represent facial images as 128 dimensional vectors.
Finding vector representations
Unit test items are stored in image paths variable in the previous step. We are going to find vector representations for those facial images. Here, preprocess face function covers face detection and alignment whereas predict function handles representation.
instances = {}
for img_path in img_paths:
    #raw image name without path and extension
    label = img_path.split("/")[-1].split(".")[0]

    embedding = DeepFace.represent(img_path=img_path, model_name = "Facenet")[0]["embedding"]

    instances[label] = embeding
Neo4j client for python
We can communicate with neo4j server with its python client.
# !pip3 install neo4j-driver
from neo4j import GraphDatabase, basic_auth

driver = GraphDatabase.driver("bolt://localhost:7687"
   , auth=basic_auth("neo4j", "neo4j"))

session = driver.session()
You can flush your graph database in initialization to have an empty graph database. Match (n) command finds all existing nodes, detach delete n command deletes the node list returned from the match command. Of course, you can run this delete statement in neo4j console.
#flush database
result = session.run("MATCH (n) DETACH DELETE n")
#MATCH (n {name: 'img1'}) DETACH DELETE n
Creating nodes
We have found vector embeddings for facial images in previous step. Now, we will insert facial image entities as nodes. Vector embeddings and labels will be its properties. Let’s prepare those statements first.
statements = ""
for img_label in instances.keys():
    statements += "MERGE (%s_face:Face {name:'%s'})" \
                  " SET %s_face.embedding = %s \n" % (img_label
                  , img_label, img_label, instances[img_label])
This actually creates a string pattern as shown below:
MERGE (img1_face:Face {name:’img1′}) SET img1_face.embedding = [1.0574057, 1.0961407, 1.26431870, …]
Here embedding array consists of 128 items because FaceNet represents facial images as 128 dimensional vectors.
Copy the merge statements into the clipboard in ne4j console. Multiple merge statements could be run once. It declares that 1 node created with 2 properties (name and embedding).

Creating nodes with python client
Neo4j console is pretty but running bulk data could cause crash that’s why I’m going to create nodes with python client.
with session.begin_transaction() as trx:
    trx.run(statements)
    trx.commit()
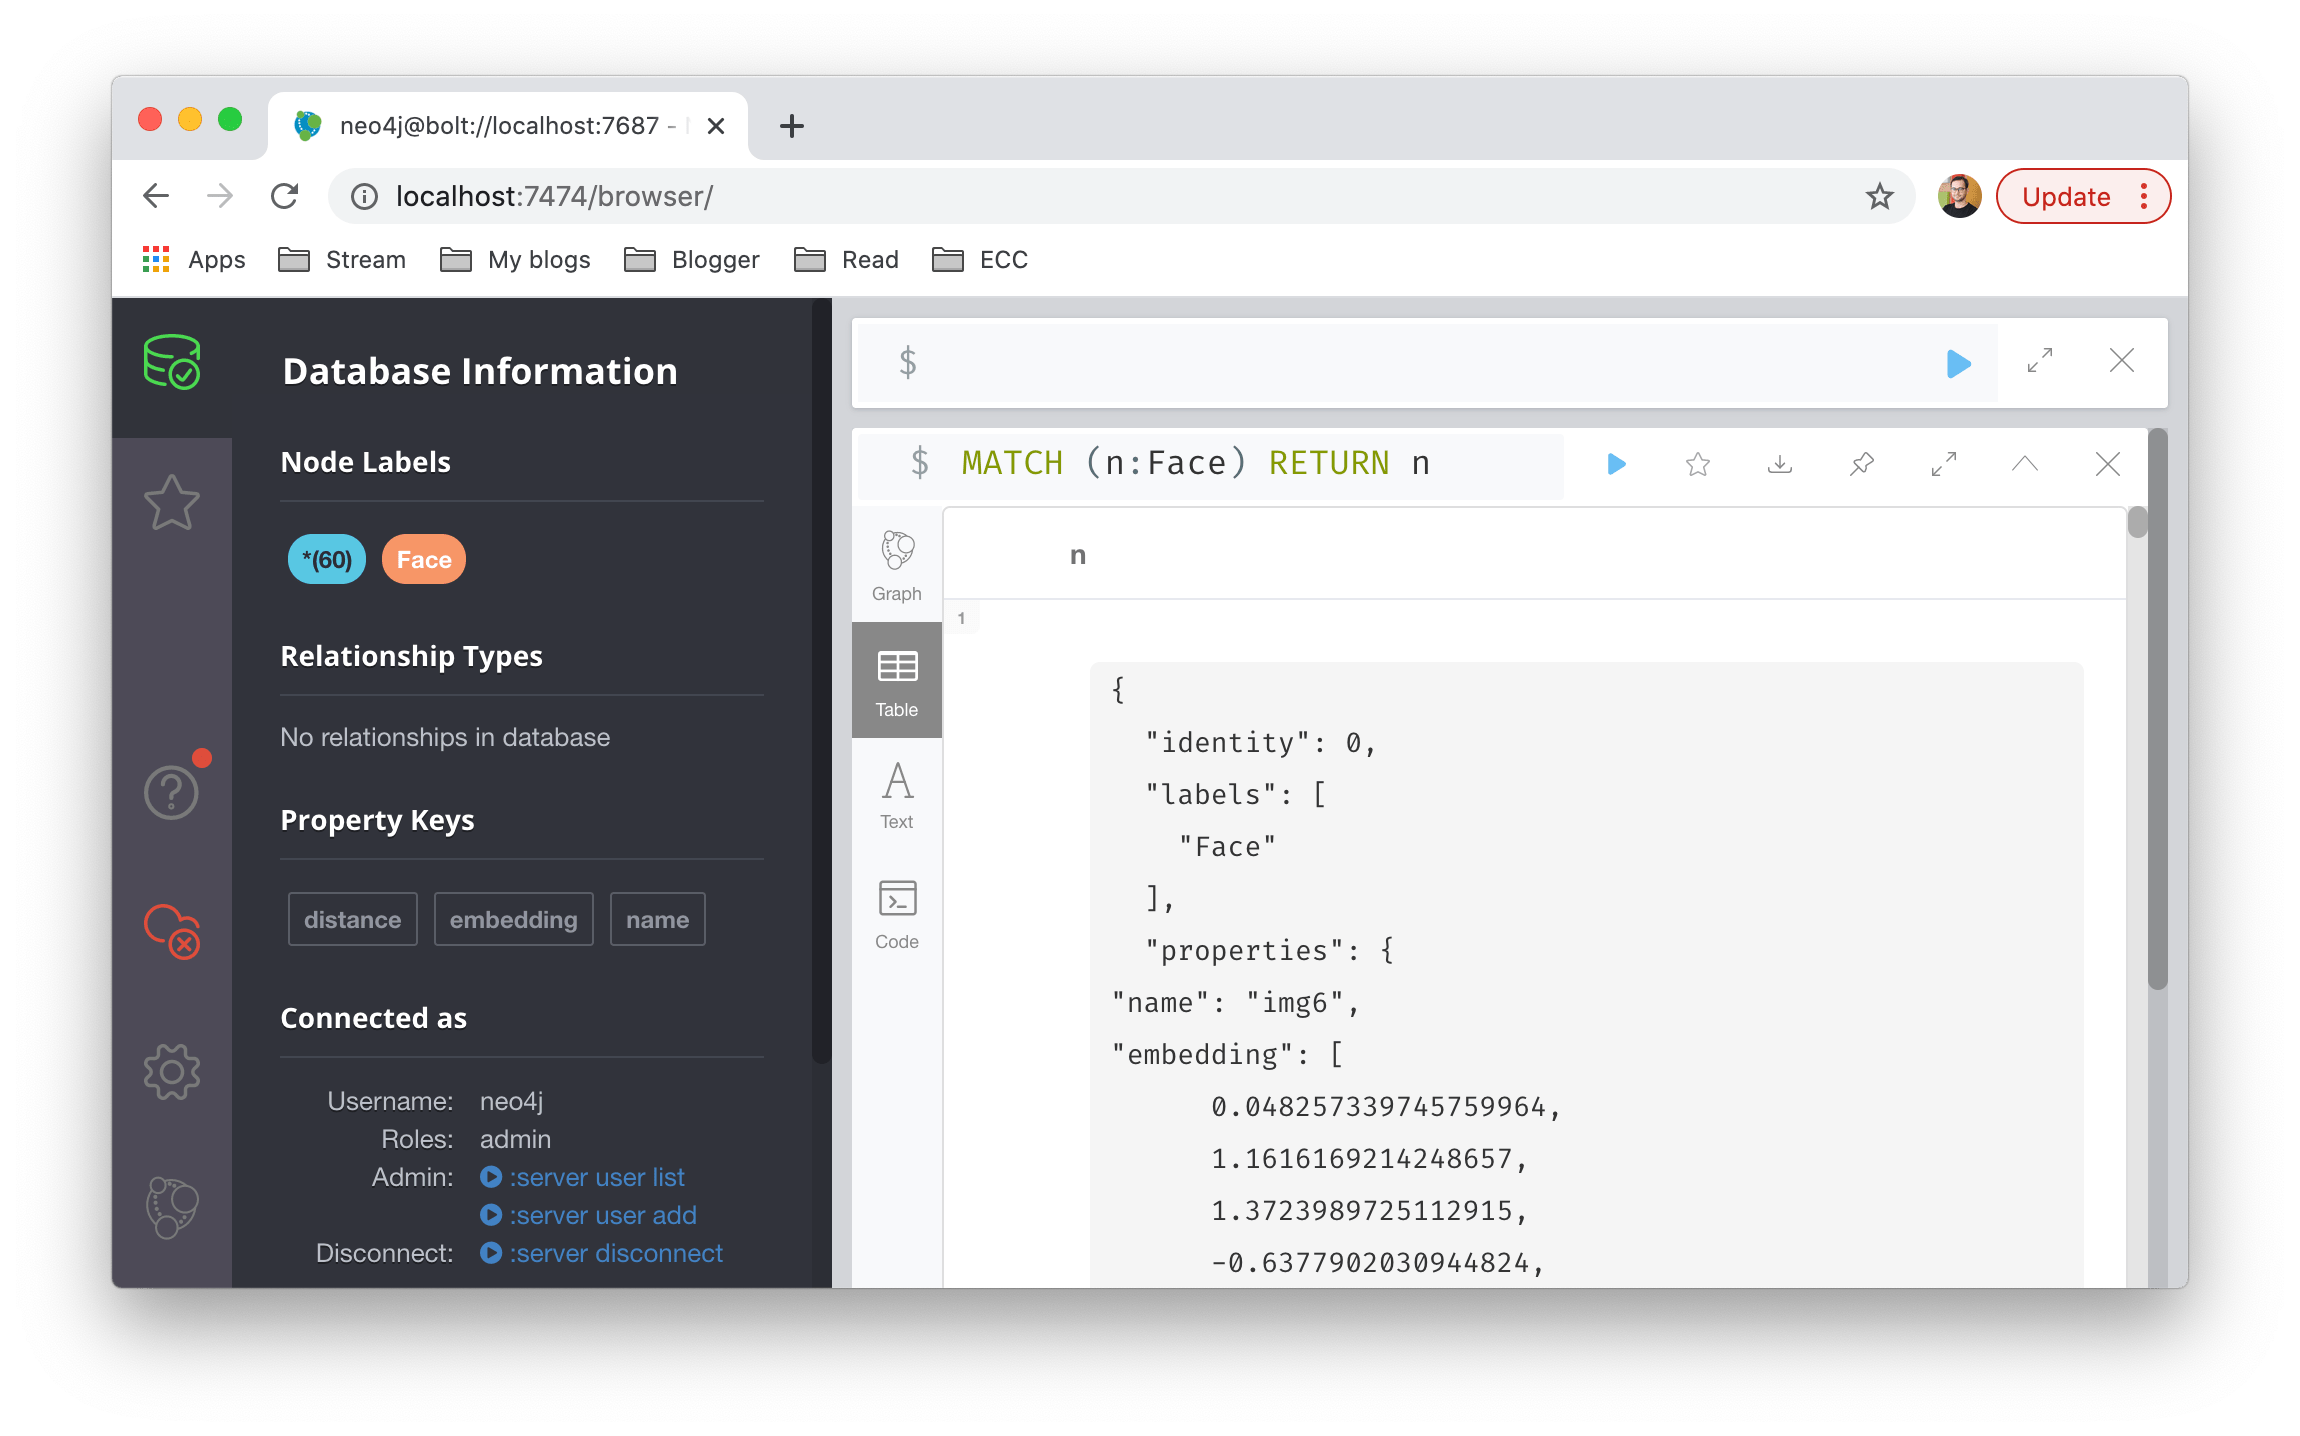
You will be able to see created graphs in the database information tab on the left in the neo4j console. Clicking the Face label shows the created graphs.

Finding similar ones
All items in our facial databases were created as nodes. However, they are totally independent. We currently do not know the relations of those nodes. I mean that Angelina Jolie could be represented as several nodes in this graph. I plan to create edges (or connections) between same identities.
Nodes store vector representations of facial images. You can see it in the table view.
Now, we need to find the distance values between nodes first. We can run a cypher shell script as shown below to find distances between different nodes.
MATCH (p1:Face)
MATCH (p2:Face)
WHERE p1.name <> p2.name
RETURN p1.name AS source, p2.name AS target
, gds.alpha.similarity.euclideanDistance(p1.embedding, p2.embedding) as distance
ORDER BY distance ASC

Creating edges
We know that the threshold of FaceNet model and euclidean distance pair is 10. I mean that if distance between the vector representations of same person should have a value less than or equal to 10. Let’s create edges if that condition satisfied.
MATCH (p1:Face)
MATCH (p2:Face)
WHERE p1.name <> p2.name
WITH p1, p2
, gds.alpha.similarity.euclideanDistance(p1.embedding, p2.embedding) as distance
WHERE distance < 10
MERGE (p1)-[e:distance]-(p2)
SET e.distance=distance
This creates an edge between two nodes. Notice that the edge has no direction. I mean that the edge from node A to node B is same with from node B to node A. If your task requires directional edges, then you should modify it to MERGE (p1)-[e:distance]->(p2).
Relationships
This discovers very interesting relationships between nodes as illustrated below.

There are obvious clusters in the graph. Let’s mention some of them. A young photo of Jennifer Aniston (img12) is weakly connected to the cluster. Graph approach comes with an advantage in face recognition. For example, if we compare the image pair – img12 and img55, they have a distance greater than 10. That’s why, we will label them different persons. However, the both images are connected. In this way, I can confirm that they are same person.

Scarlett Johansson and Katy Perry have clusters on the graph database as well. Notice that I do not know the identities of those items. Graph database found the relations.

Super Fast Vector Search
In this post, we focused on using the k-NN algorithm to find similar vectors. However, this approach becomes problematic with large databases due to its time complexity of O(n + n log(n)). Imagine indexing all images on Google! To address this, we use the approximate nearest neighbor algorithm, which significantly reduces complexity and allows for super-fast vector searches. With this method, you can find the nearest vectors in a billion-scale database in just milliseconds. Many vector databases and indexing tools, such as Annoy, Faiss, ElasticSearch, NMSLIB, and Redis, adopt a similar approach.
Tech stack
Tech stack for facial recognition studies has a wide range. Here, we could locate neo4j or graph databases in the both sets of both face verification and face recognition.
Conclusion
So, we have mentioned how to use neo4j graph database for face recognition tasks. It offers to discover relations we cannot find with regular tools and approaches.
I pushed the source code of this study into the GitHub. You can support this study if you star⭐️ the repo🙏.
Support this blog financially if you do like!


